In this video I show you how to mount a TV on drywall. The principles in this video apply to any type of Television Mount. For this install, I used Toggler brand toggle bolts. This is something you can do as an independent information technology field tech.
Amazon List of Tools and Supplies In This Video:
https://amzn.to/3slyIeV
I have been in the freelance IT tech industry since 2000, on Field Nation since 2010, and on Work Market since 2011. Field Tech Academy wants to give you the secrets of 20+ years of experience how you can succeed as an Independent IT Field Tech working with Field Nation alternative companies.
Have questions or want me to cover something I missed in a video? Feel free to leave me comments and I’ll do my best to help!
Subscribe to Field Tech Academy’s YouTube Channel: https://youtube.com/@fieldtechacademy
If you would like to learn more about how to find Field Nation alternative clients or about being an independent IT field technician, watch our other videos and visit our website for coaching services.
www.fieldtechacademy.com
===========================
Connect with us!
LinkedIn: www.linkedin.com/company/fieldtechacademy/
Facebook: www.facebook.com/fieldtechacademy
Contact Us: https://fieldtechacademy.com/contact-us/
===========================
Support The Channel!
Love the channel and want to support our work?
You can go to the “Tip Jar” on our website to leave a tip:
https://fieldtechacademy.com/product/tipjar/
You can also support the channel by clicking this link to Amazon before you make a purchase. For the next 24 hours, we get a small commission for the things you buy:
https://amzn.to/404iZ02
Video Transcript:
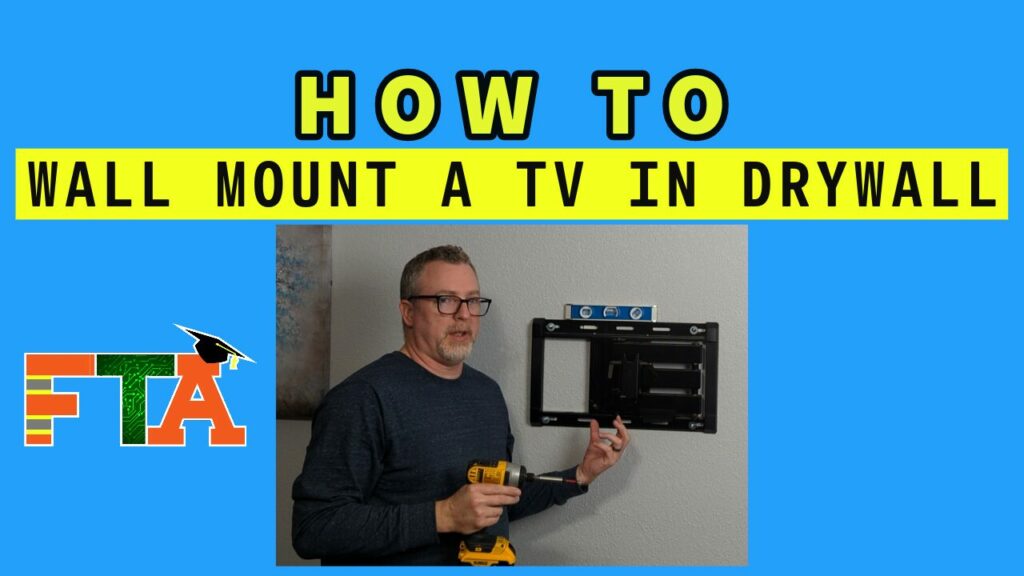
In today’s video, I’m going to be showing you how to wall mount a TV. I’m going to show you generic principles on how to wall mount the TV. That way you can just learn from this video by whatever mount that you like and use these principles.
Hi, this is Michael with Field Tech Academy. In today’s video, we’re going to be mounting a TV to a living room wall. Anytime you’re mounting a TV in a living room setting, people are going to be sitting down. So you don’t want the TV to be incredibly high because you don’t want people craning them next to watch the TV.
Most of the time, 42 to 48in is what you want to go for for the bottom of the TV. The first step is going to be to figure out where the bottom of the TV is going to be, based on the wall mount. What I found the best to do is to stage your wall mount on your TV.
In this case, I’ve already applied the plate and this particular one is a VESA mount V E S A, and it just goes in the four main holes in the center. A lot of other TV mounts you’ll have will have four bolts on the outer edges. So you’re gonna need to look at your TV to figure out whether it has four tight bolt holes or whether it has four that are further out.
Once you’ve got your plate on it, you’re going to take your wall mount and you’re going to stage it on your plate. This will allow you to get measurements so you know where the bottom of the TV should be. You want to figure out where the top mounting holes are on the bracket in relation to the bottom of the TV.
So in this case, I’m going to go from here to the bottom of the TV, and I’m going to say that it’s roughly 17in. So I know that the top mounting holes need to be 17in from the bottom of the TV. In this case, I’m going to do 48in to the bottom of the TV from the floor. 48 plus 17 is 65.
So I know I you do it from the bottom of the floor to this hole is going to be 65in off of the floor. So I’ve located the center of my wall where I want to put the center of my TV. I’m going to measure for 65in so I know where I need to put the top holes of the bracket.
So I want the top bracket to come up to 65in. So I can take my bracket. And you can see that the bracket itself will be here, but the TV is going to go 17in from here down below. When you’re mounting a TV, you’ve got a couple of options. You can run lag bolts into studs. If this particular location where I want to be doesn’t line up where I don’t have a stud in one of these areas, then studs don’t do me any good.
They are obviously the most secure places that you want to go. This bracket is pretty wide. But again, if this is center, I don’t want to have to shift my wall plate over to catch a stud. So we’re going to use togglers if we can’t line up to a stud. If you’re installing an articulating mount and articulating means that it moves, it’s not a static mount.
You’ll see that this can swing out. Something you might overlook is that this is going to be the center of your TV. So let’s say that this was your center point. You don’t want to line up your bracket with the center hole on this centering point, because the center of the TV is actually over here. This is the spot you want to center.
So in theory it would be here rather than over here because that articulation mount moves it over slightly. Want to observe that if you have a standard wallplate that has hooks on it, then that’s not such a big deal because you can center that. And most of the ones that have just two arms for brackets, there’s movement where you can slide left and right, whether or not we’re going to mount into studs.
We want to know where the studs are. If you don’t know general construction principles, you need to know that in most cases, an electrical outlet is going to be mounted to a stud. So that’s going to be a good point of reference to try to look for studs. I’ve had a lot of trouble with the generic stud finders.
So this is a very simple device that I found. Got this on Amazon I’ll put a link to it in the description. It is a rare earth magnet stud finder. You’ve got some sort of stud behind this drywall. And the drywall is attached to the stud with nails or screws. That’s where the magnetic stud finder comes into play.
If you’re going to run along the area that you think. So I know that I’ve got an electrical outlet down here, so I know that probably somewhere in this area, I’m going to have a stud. So you’re going to look, and right there I actually found one pretty quickly. And so there’s one. Now I don’t want to make a judgment call based on find one.
I want to try to find more than one.
Okay. That’s in line. So that’s going to tell me that I’ve got a stud running down and right here. That means that this is probably mounted on the left side of the stud. So the stud is probably right here. Let’s look at our mount and see if using a stud is going to be something we can do. So if I know that this is my center on that stud.
And I got this to work with.
So I’ve only got about this far over to catch a stud on the edges. Obviously, I could put the center of this into the stud, but getting the edges is going to be kind of challenging. If I already come over here and try to find another stud.
So that is probably going to be too far over to catch my bracket. Because again, if I’m going here for center my studs over here. So I’ve got them two separated to really put my edge of my bracket into the stud That’s why we use togglers. Even though we’re not going to use the studs, we want to know where they are because we don’t want to drill into them accidentally.
So by knowing that this is where my stud is, I’ve pretty much got open drywall here and open drywall here. I have an electrical outlet below me, so odds are I shouldn’t have any electrical on the left or the right side of this. Obviously whenever we drill and we cut, we’re going to be cautious. If we feel something in the wall, we’re not going to get aggressive with it until we can identify what it is.
If you’re not familiar with toggle bolts, this is a toggle bolt. You might look at this and say, well, I don’t want to mount a TV into drywall. These will hold somewhere north of 250 pounds in half inch drywall. Most TVs and the mounts combined are not even going to be 100 pounds, so you can safely mount it to drywall using toggle bolts.
To use this, what you’re going to do is you’re going to make a half inch drill bit hole in the drywall. You’re going to fold this over to see how this folds. And when you fold it, this extends, or draws this back, however you want to look at it. And then this will go into that half inch hole.
Then you will, on the outside of the wall… So this will be on the inside of the wall, this is the outside. You’re going to pull it flush like this. As you can see, when I make this flush, this pulls this straight. And you’ll pull this against the back of the drywall. Then we’ll snap this off, and we’ll put a bolt in.
So I know this is the spot where I would put the top row of my mounting holes. Now I just need to figure out the center where I want to center my mount, which in this case, the homeowner has told me they want the bracket put basically in between this electrical and this coax, centered on these. I’m just going to measure this and say, okay, I’ve got basically 18in that’s 18 slightly under 18, but effectively that 18in to work with.
So nine should be my center point. So this should be our center point. And again remember we want to center the TV on this spot. We do this so that when the TV is flush against the wall it is centered rather than centering it on this or centering it on this hook. I’m going to mark top and the bottom of my bracket, and that’s where I’m going to put my first hole.
I like to put one bolt in, attach the bracket where it’s hanging, and I’m not going to have to fight it before I try to level it off and do the second one. Of course, all these principles are going to apply in residential and commercial. The only variables are going to be the construction type. Are you going to be dealing with drywall or the cinder block, all those different types of options. For toggle bolts
we’re going to make a one half inch hole. I’m going to try to center it on this mark that I made.
Pull scrap off of that. Another reason I make one hole is in the event that I misjudged, and there actually is a stud here, I’m going to find it right now. Then I can recalculate where I’m going to make the rest of my holes. Now we’re going to do our toggler. So again, we’re just going to fold this flush.
And we’re going to stick it through the hole, metal end in.
Okay. And we’re going to pull this straight. We’re going to pull against the back of the wall. You want to try to pull this and turn it a little bit just in case there’s insulation in the wall I want to make sure that that metal bar is flush against the inside of the wall. If for some reason there was an obstruction that caused that metal bar to be turned just a little bit, you’re going to have an incredible problem getting this bolt to line up to the threads of the metal piece.
Now there’s different brands of these. I’ll put an Amazon link to these in the description so that you can find them on Amazon. You can also get them at Lowe’s. They used to be sold at Home Depot, but now Home Depot has switched to some other brand. And that brand is terrible. The plastic breaks too easily, can’t get them lined up right. But the toggler
brand is the one you want. So once you get in the wall, this zip ties down basically. Now push this little piece and you can squeeze right here to get it into that hole. And that kind of solidifies it for you. You do need to make sure you’re pulling that metal as close. You want the zip to be as tight between the zip and the metal as possible.
Once you got that tight, you’re just going to break it off. Now we will be able to take our bolt. We want to verify we’ve got it straight. And so I’m able to get into that metal bracket on the back side. So I know I’m good. You want to do all that before you try to have the bracket up in the air and all that.
One issue you might run into is that the toggle bolt’s head is kind of small, so I use a small washer. I like to know when I put this here, it’s not going to slip through those holes. Now we’re going to the first bolt. When you’re attaching this to the wall, you want to make sure that you’re not putting a ton of pressure on this bolt, because that metal piece on the inside can easily slip off of this plastic when you’re doing an install for a Field Nation alternative client.
So the first few threads and while you’re actually tightening it up, you don’t want to put a ton of pressure on this with your drill or even your hands. All right, I’ve got that lined up. I’m just going to stick my bolt in the hole. And you want to make sure that you can tighten it by finger strength so that you know that you’re lined up and everything before you really put any big torque on it.
I don’t want to lock this down yet, because I’ve still got to get my level figured out and my other hole figured out, but right now, I’m going to gently let this dangle. Again, you’re dealing with other people’s property, so you don’t want to let this scratch the wall. Get out my trusty level.
The other thing you want to do is try to make sure that you’re leaving this bolt centered in this opening. You don’t want to push all the way to one side or the other. You want to try to leave it in the center so you’ve got room to work with. And we’re going to see if we can find our level.
So that’s our level spot. I’m going to go right in the center of this hole. I’m going to mark the top and the bottom, just like I did over here. Now the reason I marked the top and the bottom is because if I just mark one or the other one, what if I put my drill bit into that top line, then that’s not going to be the same level as what this is at.
So I know that I can put my drill bit right in the middle of these two lines, and that should keep me level. I put my drill bit right between those two lines, center it, and I start my hole.
You want to get rid of the excess there so that my toggle will go in level. Grabbing my washer, my bolt, and my toggle. Step one: Get the toggler in. So again we’re going to fold this where it’s lined up with the plastic.
We’re going to pull this flush. We’re going to make sure we’re against the interior of the wall. Zip it down, and press down with our thumbnails. And we can actually hold tension on this and try to pull it out a little bit. So make sure that zip tie is down as tight as possible, and break off our edges. Now we’re going to attach our bolt, and we’re going to retest for level.
As well as making sure we can actually get it threaded. We’re going to double check our level. The drill bit drifted on us or I measured something wrong. We are slightly off, but we do have room because of those bolts. You’ll see there’s a lift here. So if we can correct it on these bottom two then we will be level.
So I just need to go up ever so slightly. So I’m going to mark these up. We’re going to try to set these higher. Since I’ve got a couple in here, then I’m not having to hold the whole bracket, hold the level, try to mark it at the same time. Top and bottom of this hole on both sides.
So I should be able to tighten this down with these new holes and fix the fact that I dropped level off just slightly on that one. Now, in order to get to these holes, I’m going to have to let this pivot back down. We’ve got our marks, I’m going to try to put this in a dead center.
I’m going to pivot up so I can drill in this hole.
Let’s check and see if this helps us out on our level. That’s about as good as it’s going to get. Now, I can still lift up just slightly as I’m drilling this down and really locking it to the wall. Now I have everything finger threaded, I’m going to actually put some drill on it. But again, I don’t want to push super hard because I don’t want to push that bracket off on the inside.
Again, I want to try to adjust just slightly for that being not quite level. Level is perfectly on. Now I can tighten everything else down.
So mounting in drywall with togglers, you say, won’t work. I weigh 200-ish pounds. It’s not going anywhere.
Bracket is in place. TV is ready to mount on the hook. Then we’ll get the TV mounted up. I’ll show you the end result.
And voila! The finished product. Perfect for living room viewing. And ready for our hutch to go underneath with all of our electronics. If you got value today, please like the video and subscribe to the channel. Check out my other videos. I’ve got playlists on example service calls, training on Field Nation and WorkMarket, as well as some tips and tricks like the ones we did today.
Also check out my website at fieldtechacademy.com. I have downloads available that will help you in your Field Nation or WorkMarket journey. I also offer a Field Nation alternative client list to open up your world to new clients that work like Field Nation and WorkMarket, where you can make additional income. And as always, let’s get you out in the field making money.
I’ll see you in the next video.